Companies launch their websites, the main asset of their online presence, to showcase their products and services, increase visibility, and identify their brands. Websites help businesses reach and engage with a broader audience, increase sales, communicate their mission and vision to their customers and stakeholders and build trust and credibility.
For websites to provide those benefits, they must be very delicately and professionally built in order to function correctly all the time. Poorly performing sites have the potential to draw off users shortly after visiting them, and this is the last thing a company would want to experience.
For this very reason, websites must constantly be monitored for any issues that may pop up and impact their performance, functionality or responsiveness. In this article, we are going to discuss website analytics, the means business owners can use to keep track of their websites in terms of what these website analytics are, why they are essential and how to use them to ensure websites are operating properly.
Website Analytics
Website analytics, as a concept, is the collection, measurement, and analysis of all data related to website usage.
The tools used to do these functions, also known as website analytics, run systematic checks on websites and analyse the resultant data to see how they are doing based on their assigned targets, whether they are a success or failure, and what to do to improve them in terms of performance, user experience, and SEO.
One of the many elements that website analytics test, for instance, which highly impacts performance is website traffic.
Traffic refers to a website’s visitors in terms of their numbers, how they found the website, what pages they viewed, how long they spent on the website as a whole, and whether or not they completed any of their desired actions, whether this is making a purchase or filling out a form, before leaving.
After assembling all this data, the website analytics tool analyses it and concludes how well the website is doing. Is it popular among users? Do they like what they browse? Are they making any purchases? If the answer to any of such questions is not satisfying, it means that the website is not functioning as desired, and the tool then suggests different reforms to enhance the website’s function.
Importance of Website Analytics
That being said, there are a lot more reasons why website analytics are important. Understanding that will definitely help you as a website owner to choose the tool that best matches your goals and utilise it to achieve them.
First of all, website analytics help you understand your audience. As these tools provide valuable insights into who is visiting your website, where they are coming from, and what they are interested in, as well as other helpful information, you can then get a better idea about your website visitors and tailor your content and marketing efforts toward satisfying and engaging them and increasing traffic in general.
Website analytics are also important for measuring performance, as we mentioned earlier. Besides traffic, website analytics help you track important metrics like bounce rate, time on site, unique visitors, traffic source, conversion rates and so on. Monitoring all of that lets you identify which areas of your website are performing well and which ones need improvement.
This, in and of itself, is another significant benefit of using website analytics as they reveal actual growth opportunities. For example, if you notice that a particular page on your website is getting more traffic, you may want to consider adding more content to that page to attract even more visitors.
The opposite is also true. If some of your audit reports show that a specific page or web file is causing too many loading issues, which, in return, can increase the bounce rate and drive users to leave your website soon after coming in, you will then know you need to customise content on this page, replace that web file, or do anything else to optimise that page.
In other words, website analytics allow you to make more informed decisions and generally take a data-driven approach to run your website and ultimately achieve better results.
Now that you understand how significant website analytics are, in the next section, we are going to discuss two of the most efficient tools you can use to assess your website’s performance and SEO. These tools will also have a better understanding of how your website is helping you achieve your business goals.
1. Gtmetrix
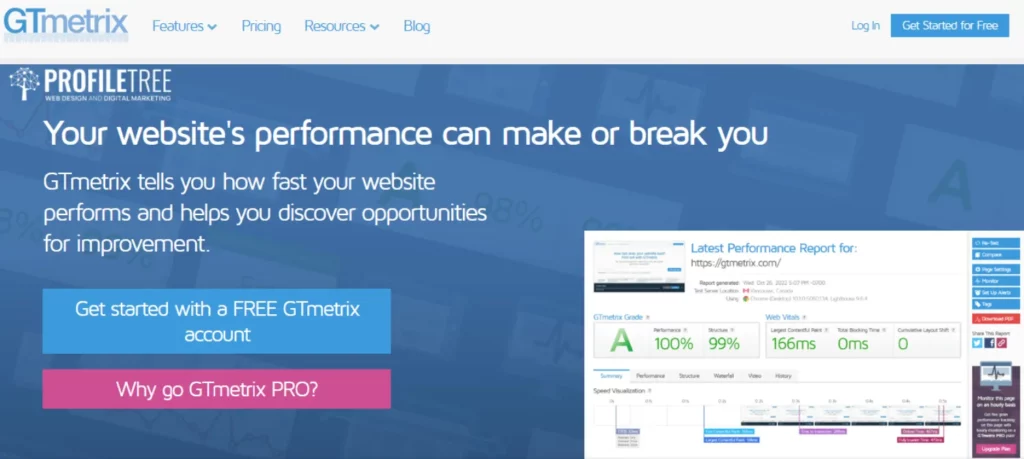
To succeed online, you need a fast website. Improving your website’s speed will provide many benefits, such as a higher position on the search engine results pages and making your visitors stay longer. So, when it comes to auditing your website for speed and performance, one of the best website analytics tools you can use is GTmetrix.
The way GTmetrix works is that it analyses your URL and then generates a report showing the current state of your website, concluding in a performance score. This score is based on results GTmetrix obtained from Google Pagespeed Insights and YSlow. It then gives you various parameters identifying what is going wrong that makes your website slow down and recommendations to make it run faster.
This means that you do not have to perform the tests on any other tools since the results that GTmetrix derives cover a big scope of performance metrics and present them comprehensively.
Test Factors
It is central to make sure that the test results are accurate and relevant. The more precise they are, the more well-informed decisions you can make, which will eventually help improve your website. Therefore, there are a few factors you need to consider before you run a speed/performance test using GTmetrix.
The first thing to consider is the number of tests. It is never enough to do a one-time test since the results do change based on the amount of traffic, which itself is never consistent. You need to repeat the test at different times throughout the day to get more insights.
Test locations are also important. If you have a local audience, you might want to set the test in the nearest server to your visitors, which is something you can easily do with GTmetrix. For instance, if your audience is based in the UK, you can choose a UK-based server to test your site with. This will give you more accurate results.
But if you are targeting global audiences, then you should do the test in multiple regions around the world and not just one.
Another critical factor is subjects. You need to test multiple posts and pages to get a better analysis and find out which parts need to be optimised.
Keep in mind that the primary goal of optimising your website is to improve the entire site’s performance rather than just the performance score. In other words, you have to take each suggestion on the report into account to decide what will make the largest, most positive impact.
The GTmetrix Website
You can use GTmetrix in two different ways. The first one is from the website itself. All you need to do is just go to gtmetrix.com, click Get Started for Free at the top-right corner of the page, type in your first name, last name, and email and choose a password.
Once you have created your account and logged into it, you can start using GTmetrix. The easiest way to do that is just by inserting the URL of the website you want to test to the bar on GTmetrix’s homepage. However, before you analyse the website, you need to customise a few options first.
As we just mentioned, one of those customisation options is the test location. By default, GTmetrix will test your website using the Chrome browser on a server based in Canada. But you can change that from the Analysis Options button beneath the URL bar.
From Analysis Options, you can choose another server for your test. There are multiple options found in different regions around the world, so choose the server that is the closest to your local audience, as we mentioned earlier. You can also alter the device used to test the website and the type of connection as well.
There are many options to choose from, yet their availability is based on the plan you are using. GTmetrix’s free plan obviously has fewer options than the Pro ones.
Once you have selected your new location, device and connection settings, click Analyse, so GTmetrix can start testing your URL for all the different audits it has. After it does that, GTmetrix will give you a detailed report of how your website is doing.
GTmetrix Performance Report
At the top of the report, you will see a performance score and a summary of the time your website took to load. Underneath that, you can see the six tabs covering different sections of the report. These are Summary, Performance, Structure, Waterfall, Video and History, each consisting of various suggestions to improve your website.
The Performance tab, for instance, shows how fast your website is and provides recommendations based on Google PageSpeed Insights, such as leveraged browser, caching, image dimensions, enabling Keep Alive, and minifying HTML.
YSlow is similar to Google PageSpeed as it also gives suggestions for improving speed, but it provides different solutions like making fewer HTTP requests, reducing DNS lookups, and using CDN.
Another example is the Waterfall tab. This one basically shows you how long each resource took to load. Examining this tab will offer lots of insights into which resources should be optimised.
For example, if a particular image is taking too long to load, then you know you can use an image optimiser, either on a WordPress plugin or even just a website, to reduce the image size and improve the loading score.
The Video tab shows you a clip of how long your page took to load while the test was running. You can see which elements of the page took longer to visually load. You may also download the video if you want to document your website’s performance on each test, but you will need to click Enable Video first and then retest.
Then you have History. This tab shows you the history of test results and the change in page load time, size, speed, and YSlow scores throughout the entire period you have tested the website using GTmetrix.
The great thing about GTmetrix is that each of those tabs has this little question mark or a little button reading ‘Learn how to improve this,’ which gives you a little more information into what those audits actually mean.
If we were to click on this button, for example, it would take us to another page, GTmetrix’s own documentation, that will show you precisely what that audit is, what it is about, what triggers it, how it affects your load time, etc. This is especially critical for beginners to better understand what their website is having trouble with and how they can fix it.
The GTmetrix Plugin
The other option to use GTmetrix is by downloading the GTmetrix plugin and adding it to your WordPress website. This way, you can test the site directly and more easily from your WordPress dashboard as opposed to going on the site over and over again.
To add the GTmetrix plugin to your site, you have to log into the backend of your site and go onto your dashboard. You should then go to Plugins, click on ‘Add New’ and in the search plugins bar, type GTmetrix. Click on Install Now and then go ahead and activate it. You can see a new GTmetrix tab appear on the left menu bar of your dashboard.
Click on the GTmetrix plugin to set it up. The first thing you should do is set up the authentication, for which you need an API Key so you can use the plugin. You can get the API key by creating a free account on GTmetrix, as we have done earlier.
Although the free account comes with a limited number of requests per day, if you are using this on one website, then you are likely to never run out of credits for that.
Once you have created your free account, go to the Account on the top-left corner of your GTmetrix dashboard and click on Generate API Key. If you have multiple websites, then you get one API key for each of them.
Copy the generated API key and go back to your website, then paste it into the API Key bar there. You also want to type in the email account associated with that API key. Once done, click Save Changes.
Plugin Options
Once all changes have been saved, you can see that you now have a lot more options on that WordPress settings page. Each of these options will help customise your testing and also the plugin on the dashboard. For instance, you can show the new GTmetrix widget on the dashboard. This just means you get an easier way to test your dashboard from the plugin.
In addition, you can decide if you want to show GTmetrix on the toolbar, default your adblock status, turn on the adblock and see the difference it will make on-site and how it is affecting its performance.
Another option allows you to test your default location. Whenever you are testing your website, this will let you choose an overall location for your website, and again, you want to base this on where your target audience is. If they are based in the UK, you want to pick a server that is the closest to them.
Likewise, if you are targeting global customers, then you would need to run a few tests on different servers every day.
After that, you want to set up the alert email. This option lets you decide who the alerts will be sent to whenever a test is being run or when any other alerts are made up from the plugin. So you can decide whether you or another user on your website will receive that.
Next, you can set the front page of the URL. This is just whenever you are testing the web port from the button on the dashboard; it will use whatever URL that you set in the front page URL.
The next section helps you decide how you want the widget to show if you want to show page speed grade, YSlow grade, scores, link to the plugin, etc, on the dashboard.
Below that, there is an option to reset the test. If you click that Reset button, it will flush all of the GTmetrix records from the WordPress database.
When you are done, click Save Changes.
GTmetrix Plugin Test
Under the GTmetrix plugin on the left menu bar, you can find Tests, and this is exactly where you can start performing tests on the different pages of your website.
It is actually quite simple. Basically, you just want to insert the link to or type in the title of the page you want to test, then add a label for the test. This is actually an option. So, if you do not name your report, the plugin will just generate any name for it.
Afterwards, you can decide if you want to block the test with Adblock Plus or if you want a video associated with it. The latter option requires five API credits, so make sure you check how many API credits you have every day on your dashboard on GTmetrix.
When you are done, click on Test URL Now. The plugin will only take a few seconds to test the page and generate a performance score. Beneath that, you have options to retest your scores and see a detailed report, a brief summary of the load time, or how many requests were made.
If you click on Detailed Report, it will take you to a more detailed report on the GTmetrix website with more information on what needs to be done in terms of improvements.
Website vs Plugin
The information you will get from the plugin is the same if you run your test on the normal GTmetrix website. The only difference is convenience.
Put differently, you only need to install one plugin, and you can do the testing from your dashboard as soon as you log in instead of having to go to another website and do it there. The plugin itself is quite lightweight and will not affect your load time too much.
That being said, if you are fine just using the normal GTmetrix website, then there is no need to use the plugin.
You can see in your account dashboard how many credits you have and when your credits will reset. If you need more, you can always purchase them from gtmetrix.com.
But again, if you are only using this website analytics tool to monitor one site, then the number of credits that it gives you every day on the free plan should be enough. You should not really need to top up more or go to a Pro plan.
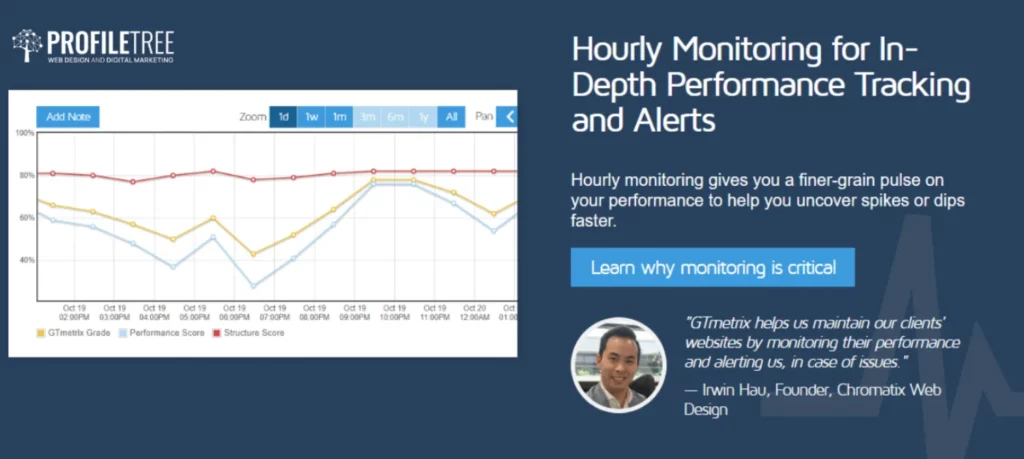
Another cool thing that you can do with the plugin, though, is scheduling some tests, which you can do if you click on Schedule on the left side underneath the GTmetrix tab.
You can set up how often you should schedule the test. You can have the test run hourly, daily, weekly, or monthly. Again, this just depends on how many credits you have every single day. You can decide to run the tests daily and whether or not you want to be emailed.
You can also choose when you should be emailed. For instance, the plugin can email you when your PageSpeed score is less than a certain grade, the YSlow score is less than a certain grade, or when the page size is greater than something. In other words, you are asking the plugin to send you email notifications when it has hit a certain benchmark for a slow-performing site.
Then, you want to set the Status. If it is active, the test will always run. If it is paused, then it will stop running.
Instead of deleting the full schedule, you can just pause it for a little bit if you want to. You can pause it due to recurring failures as well.
Once you have set your schedule up, just click on Save. When you go into Schedule one more time, you will find your scheduled test, and you will also have the option to delete it, pause it or edit it.
So those are the main differences between using the GTmetrix WordPress plugin as opposed to the website. But again, it provides the same features on both. What you are really getting out of the plugin is the convenience of having everything on only one dashboard compared to two separate ones.
GTmetrix Plans
As mentioned before, GTmetrix has a free version with a lot of features that you can get started with and use every single day. But if you want, you can also go premium and get a lot more features. GTmetrix has different plans for different kinds of individuals and businesses, as well as custom ones.
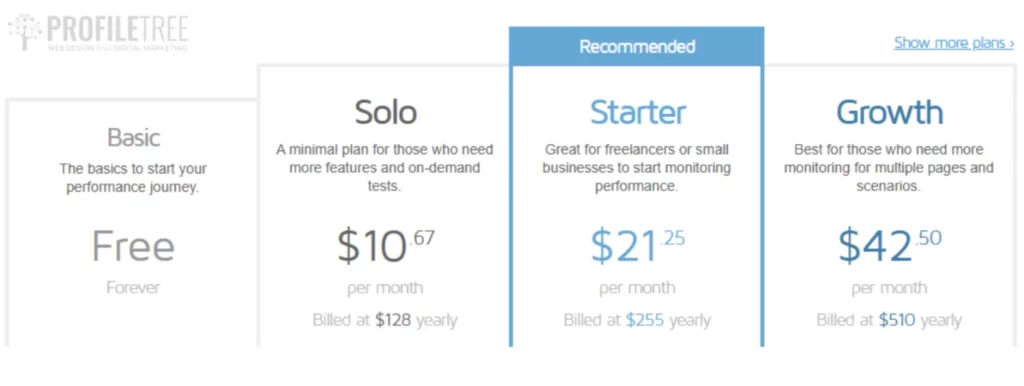
For the individual plans, GTmetrix has four of them: Basic, Solo, Starter and Growth. The Basic plan is obviously the free one where you get the chance to monitor only one page, but it gives you 25 on-demand tests weekly, five daily API credits, and a two-week data retention period. Such a plan is convenient for anyone getting started in monitoring their website.
The Solo plan—costing $10 per month as of October 2023—provides a few more features to enable better testing, such as global monitoring, premium test locations and mobile device testing. The Starter plan is best chosen by freelancers and small-business owners who may have more requirements when testing their websites. Such a plan comes with the extra feature of hourly monitoring and costs $21 a month.
The biggest plan offered by the platform so far is the Growth plan, which best suits anyone having to monitor multiple pages. It costs $42.5 a month.
Then, there are four plans under the Business category, which are crafted to suit different kinds of businesses. They are surely more expensive than the individual plans, but they come with a lot more features as well. So, there is the Champion plan, coming at $63/month, the Team plan at $170/month, and the Enterprise plan at $450/month.
Last, there is the Custom plan, where the client gets a special plan tailored around their needs in case they are not met by any of the other plans. The Custom plan’s price is determined based on the features it will provide, which definitely change from one client to another.
This is especially useful if clients have sites with very complex functionalities or more functionalities that they need. Maybe there are certain things offered within more expensive plans that they do not need, but the things that they do need only come with the more expensive plans. The Custom plan option is then there to make this match possible.
While clients can surely pay on a monthly basis, they can get a 15% discount when paying yearly. All plans, whether individual or business, are billed in USD.
On GTmetrix’s pricing page, they have a section for the frequently asked questions where clients can get more information about their plans before they move on with their purchase. Yet, if they happen to have more questions, they can contact the website, mainly via email, to send their inquiries.
Tools to Improve Website Performance
Some of the most common issues that are seen with WordPress websites that affect performance are things like avoiding enormous payload networks, properly sizing images or using compressed images.
Speaking of images in particular, they take a lot more time to load than text. This means if a page has a lot of images, it will slow down your website. Still, images are also vital for user engagement, and you cannot avoid using them.
So, the solution is to use WordPress plugins for optimising images. This just means that you can still use the exact same images yet with smaller file sizes. Accordingly, the time a page takes to load will be reduced, and therefore, the performance of your website will improve.
Smush
Smush is a really popular image optimisation WordPress plugin. It offers to optimise your images as soon as they are uploaded to your website. It can also bulk optimise the images already on your website, turn on lazy loading, resize and compress with lossless compression. This means that the image will not lose its quality when it is compressed.
Smush has been seen to improve Google PageSpeed and GTmetrix page speeds, too. It is incredibly powerful and completely free.
TinyPNG
If you do not want to add more plugins to your site, you can rather optimise your images before uploading them to it, which is actually better and more recommended.
Websites like TinyPNG are really fast and easy to use. It uses some smart lossy compression techniques to reduce the size of your files, whether they are WebP, PNG or JPEG. This means that when you are uploading the images to your site, they are already compressed, and you do not need to worry about installing any third-party plugins to optimise them for you.
TinyPNG is free to use. However, you can still use applications like Photoshop that come with a feature which allows you to save images specifically for the web in web formats, so they are already compressed for you. The only difference is that Photoshop is obviously a paid tool, while TinyPNG is completely free of charge.
GZIP Compression
Another issue that can have a negative effect on your performance is not enabling GZIP compression, which has to do with your file size as well.
File size and type can affect the overall load time of your site since any browser needs to load different file types like HTML, CSS, and JavaScript. To solve that problem, you can try using GZIP compression. To do that, you should first check whether your site enables it by using the small SEO-checked GZIP compression tool.
If your site does not have GZIP compression enabled, you can do that in either of three ways. First, you can turn it on by modifying the HTML access file. You just need to go to the public HTML directory of your site with an FTP client like FileZilla or use your cPanel on your hosting compression.
The second option to enable GZIP compression actually depends on your hosting provider. Certain hosting providers like Hostinger use Lightspeed for hosted WordPress websites, and they have GZIP enabled by default.
So check with your hosting provider first and see if they can enable GZIP compression for you if it is not already enabled. If not, it may take some manual work on your part to enable GZIP compressions.
If neither of these works out, you can install a WordPress plugin like WP Fastest Cache, whose free version will allow you to enable GZIP compression in just a few clicks.
Minifying JavaScript and CSS
Minifying CSS, JavaScript, and HTML is another way to improve your website loading time. It just removes the unnecessary characters in each file, like white space characters or newline characters.
You can try minifying web files by using tools like Minify. All you need to do is copy the original code from your GTmetrix performance report, which you can find in the Minifying suggestions, paste it to the box on minifier.org, choose your preferred language and get Minify to get your new optimised code.
Next, copy that code and overwrite the original text in your site’s directory.
You can do that with any file manager or FTP client. You also need to make sure that you are using good hosting for your WordPress website. If you are using a low-quality hosting provider for WordPress, then there is not much you can do to improve the performance of your website.
Speaking of that, one of the officially recommended WordPress hosting providers is Bluehost. Bluehost has good prices, and it comes with built-in caching as well.
You can see there are lots of things you can improve about your website, and using a website analytics tool like GTmetrix can easily point them out for you. Gtmetrix, again, is really easy to use and very user-friendly. A lot of those issues that GTmetrix highlights can be easily fixed through some plugins, which makes optimising your website quite manageable.
It is just important that you constantly test your site, check for any new or even lingering issues, and make sure that they are getting sorted out as soon as possible. Where possible, try to get your hosting provider to help, but other than that, everything else is pretty straightforward to fix anyway.
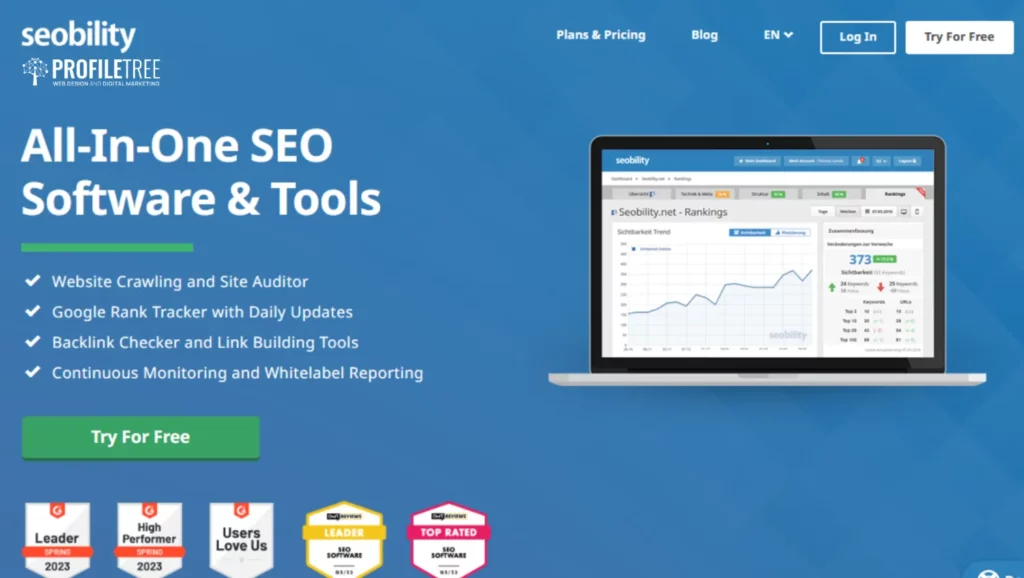
2. Seobility
Besides performance analytics, you also want to look at SEO analytics while you are optimising your website.
There are loads of tools out there that will essentially scan your site and show you issues that might be affecting your SEO rankings. Like GTmetrix, these tools will also make suggestions for improving your site on SEO.
One great example of these tools is Seobility. It is a perfect tool, especially for small businesses, bloggers, and small website owners. It offers lots of things in terms of your basic SEO to see precisely where you can optimise your site for SEO. It also changes daily, so it keeps you updated with the best practices for ranking better in search engine results.
The main thing you want to check with Seoability is their free SEO checker.
Seobility is an online website analytics tool, completely free to use and you can use it to perform an audit on one of your website pages for SEO. The tool will check that page for certain things and provide you with a report of what you are doing well for your SEO, what you are lacking, and where exactly those issues are.
For instance, you may be missing heading tags, your heading tags may not be adequately structured, or you might have duplicate tags, etc.
The Seobility test is done on a page by page basis. This means that you will need to check each page individually, one page at a time. If you are not logged into Seobility, you will only have three checks per page every day. So you can only run the test on each of your website pages three times, no matter how many pages your website happens to have.
If you want to get a few more free checks daily, all you need to do is sign up on the website, which you can also do for free.
Seobility SEO Report
Using Seobility is quite simple. All there is to do is to sign up on the website, insert the link to the page you want to run your order on into the bar on your dashboard and click Analyze Website. The SEO checker will then run an order on your site and will give you an overall score, like GTmetrix, as well as a detailed report.
In that detailed report, you will find some information about things such as response time, file size, media files, and the number of links. Seobility will also give you an overall grading on your meta information, page quality, page structure, external factors, and so on. All of these things make up your website’s overall score.
When you scroll towards the bottom of the report page, you will find a task list of specific SEO improvements with a traffic light system highlight.
Anything in red would be considered very important. You should consider making those changes immediately. Anything in orange is not as essential but is definitely something you want to consider. Green statements mean that you are doing things correctly, and there is nothing to change there.
Each of these suggestions is further explained in the Meta Specification part so you would know precisely what these changes are about and what impact they can have. What is also helpful about this is that you can use this list as a checklist to go through all the improvements one by one.
One thing to remember here is that this report is specifically for the page that you have scanned and not your entire site.
If you want to check the SEO score of another page on your website, you need to paste the link for that specific page and rerun the SEO test. You might get a completely different score or a similar score, but essentially, you will have the metrics according to each page and not to your site as a whole.
Title
The first two things Seobility goes over are the title and the meta description.
The title essentially refers to an element in the head section of an HTML document which makes and defines the title of your page. This is what Google, browsers and users on the Google search engine results pages will see.
The title is a vital element for Google to evaluate how relevant a website is for a certain search query. Keywords used in the meta title have really high importance because they help rank your webpage.
So, the optimisation of your meta title is one of the most critical SEO checks and also one of the low-hanging fruits in search engine optimisation.
So, when you are optimising your title, the first thing you want to consider is its length. In the report, Seobility will tell you what the ideal title length should be and whether you are going too long or too short.
The other thing you want to do is make sure that your title specifically contains the words that you wish to rank for, also known as keywords. But you must do this smartly. Your title should be a meaningful sentence.
If, instead, you stuff the keywords beside one another, your page title will be evaluated negatively because search engines pick up on that, and they call it keyword stuffing. This will lower your page’s SEO score and make it rank lower in search engine results.
You should also ensure that the most important keyword always comes first in the title, as Google typically attaches a lot of importance to the first word of the title.
In total, up to four keywords should be used, and you should ensure the following when including them in your title.
- Avoid anything that has any duplicate words.
- Do not repeat the exact words over and over again.
- Pay attention to spelling errors.
- Ensure the title has different terms, and that they are separated by a pipe icon or a vertical bar and not by a lateral hyphen. That just allows a more prominent display of the page meta title on the search engine results page.
Your title should be brief and concise, and it should give a comprehensive impression of what the page is about and why it is relevant to the users. Terms that do not provide any information on the page, like welcome or home, must be avoided.
In addition to that, your title should be appealing to the users in order to increase your click-through rate. Especially in online shops, titles should use calls to action to emphasise the uniqueness the products offered in comparison to competitors.
It is also worth mentioning that if you do not have a meta title defined manually, there is a good chance that Google will automatically create a title for you, and it does not always lead to good results. So you make sure you do that yourself.
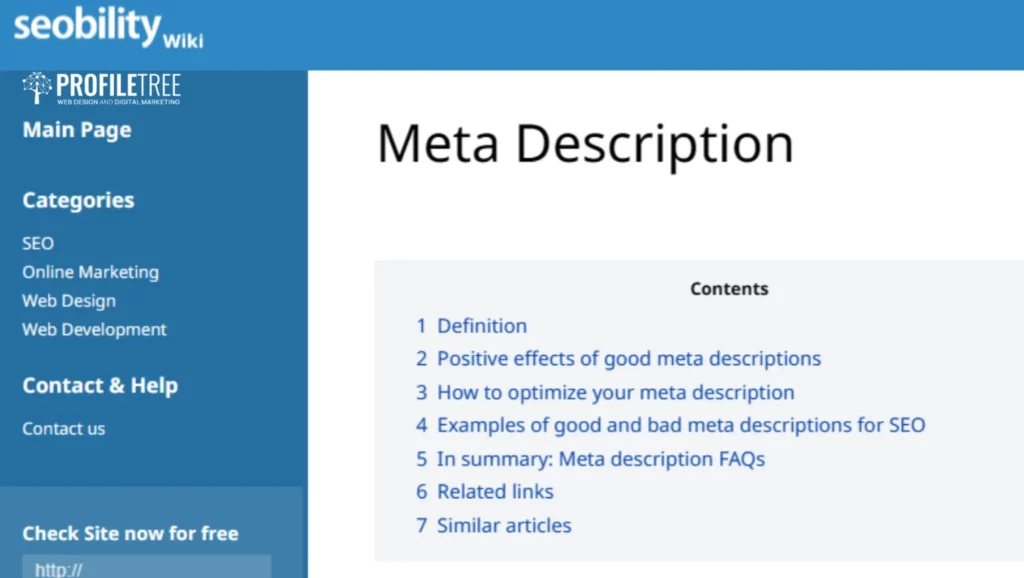
Meta Description
The very next thing to check when you are optimising your website for SEO is the meta description. Similar to the meta title, the meta description is another highly vital element to make sure that your website is ranked as high as possible. It is also part of the HTML code of a web page and is essentially there to provide a really brief description of the content of that page.
That being said, users will not see the meta description on your page, but they will see it displayed under the page’s title on the search engine results page. In fact, a search engine like Google will use the meta description to see what your page is actually about and if it is relevant to what the users are searching for.
Likewise, when users read this meta description, they will be informed what every page displayed on the search engine results page is about instead of going to each website to check. They will then use the meta description to decide which page is most likely to have the information they are looking for.
In order to improve the click-through rate, or CTR, of your website on search engine results pages, you want to choose your meta description carefully. You must make sure that it is:
- Succinct and really comprehensive of the page content.
- Including the most important keywords.
Although keywords in the meta description do not impact your website’s rankings in SEO, they should still be included there anyway. A meta description that consists of the most important keywords can generate a high level of attention, but, again, they should be used in a meaningful sentence and not just stuffed incoherently.
Besides that, you need to ensure that an accurate and content-related meta description is set for every single page of your website. You need to make it so clear to users what makes your web pages relevant to their specific problems.
Once again, and similar to the page title, if you do not set your own meta description, instead Google will take the first few lines of that specific web page and use that as a description as well. This, most often, will not bring good results.
So when it comes to optimising your website for SEO, Seobility comes in handy. It does look at your meta description, too, and checks it for things like duplicate content as well as the length. It will tell you if you are going over or under the limit, so you will know you need to make some changes here.
Crawlability
Another thing that Seobility will pick up on is crawlability. Can a search engine crawling bot easily follow the link of and all the other links on your website?
You need to make sure that there are no problems in accessing your site; otherwise, there will be a huge hindrance. If you find any issues inhibiting access to your site, you need to get in contact with your hosting provider right away and see what those issues are and how to fix them.
However, with Seobility, you are not going in blind. This tool will list those issues for you and tell you what it is exactly that is blocking your website from being crawled.
Favicon
One of the issues that can come up time and time again is favicon.
A favicon is that small symbol displayed next to the page title in the browser’s tab. It is usually a simplified version of the logo that helps users to recognise your website.
So for anyone opening several tabs at the same time, which is quite common amongst many users, these small square icons are sometimes the only orientation aid to switch between these opened websites.
Seobility will check if your website does or does not have a favicon. If it does not, it will display this in the SEO report.
Page Quality
Next, we have page quality.
Seobility will check your page quality in terms of your actual content. Is that content written in an easy-to-digest way for users? Is it broken up correctly? Is there a good amount of content? Is it readable? and many other things.
So, you want to make sure that your site is readable for your users. It is one thing to have a site full of content and keywords that Google can scan, see and rank. But it is another thing to make this content readable and easy to consume for the users.
If there is a problem with your content readability, users will be quickly drawn off, which will result in a higher bounce rate. As mentioned before, the bounce rate is the percentage of people clicking off of your site after visiting one page.
Moreover, if your content is hard to digest, users will not only leave your website shortly after coming in, but they will mostly not come back again.
All right. How can you actually better break up your content and increase its readability? Here are a few things you should check for.
- Content length, in terms of the total number of words.
- The breakup of your content, in terms of how many paragraphs it has and how long each one is.
- Using the most important keywords.
- Using placeholders
When it comes to optimising your text, you want to make sure that the text is well structured in order to improve your readability. For instance, you should divide your text into paragraphs and give each a different heading. You need to structure your content well and ensure that there is an appropriate number of headings in relation to the amount of content you have on that page.
All of these things, and more, will be evaluated and listed in your Seobility SEO report, and those with issues to be fixed will be highlighted as well. Seobility will also detect the content on any other parts of your site and let you know if there are any duplicates.
This is, in fact, a huge factor when it comes to SEO. That is because Google will pick up on other pages that have the same content, and your website will get marked down for having duplicate content, which will definitely have a negative impact on its appearance on search engine results.
Relevance is also crucial when it comes to adding high-quality content to your website. Can users relate to your content? Do they find it useful? Does it address the issues they are looking for? When these conditions are met, your website will be recognised and rewarded by Google.
Always keep in mind that you are not just creating content for Google, but you are creating it for your visitors as well. So, your text should also be highly understandable, legible, and well-written. You can also make the text clearer and more user-friendly through tables, bullet points, and tables of contents.
For instance, if it is a blog page, a particularly long one, adding a table of contents will help users scan through your content and go back to different parts of your blog. Using images and videos in order to break up your content will also give your users a break from actively reading your content and just focus on something else.
Adding videos and images is then an excellent way to keep users on your site for longer, and Google does track that. The longer the session, the better it is for your website, as this tells Google that users find this website helpful, so it will rank it higher on the results page. In other words, you need to make sure that your content is engaging.
You also want to avoid text that is too short or does not offer enough value. How long a text on a page should be in order to give readers all the necessary information just depends on the topic and is not something you can put a figure on.
The thing is, the text length and value always pair together. If the text is long enough and well constructed for SEO without offering much-added value to users, it will negatively affect your website. You are also not going to get a lot of results for online marketing in that way, either.
Similar to meta descriptions and titles, you want to always ensure your content has the correct spelling and punctuation. This will not only be well received by users, but search engines will rank that higher as well. The opposite is also true. Too many spelling mistakes will push visitors to leave your website quickly, so the bounce rate will get higher and worsen your ranking on Google.
Another thing that will come up in your SEO report is images, and images, too, have the capacity to be optimised for SEO through something like alternative text.
Alternative text is basically a text tag that you add to your images to describe them and it is actually used for different things. A really important aspect of alternative text is that it can improve user experience.
If a user is coming to your site and, for some reason, the image is not loading, instead of showing a broken image, it will show the alternative text as a description of what that image was meant to be. In other words, a correctly written alternative text should display a written version of the image.
This is also good for screen readers. If someone is visually impaired and they are using a screen reader to visit your website, the screen reader will then use the alternative text to read out what the image is meant to look like.
So, alternative text is really good from a user-experience point of view. But it is also suitable for SEO because it makes it easier for Google to understand the context of the image.
Image or file name is also an indispensable factor in ranking images in an image search. It should contain all the essential keywords, which, in turn, should match the actual content of the image.
Social Networks
Some improvements that also come up are social networks. Seobility will tell you if there are enough social sharing widgets on your page. It will flag whether you have enough or whether you do not have any at all.
You need to make sure that you have the appropriate number of social networks on your site to improve SEO and rank higher on search engine page results.
Page Structure
Let’s now address your page structure in more detail as this highly impacts your SEO score and website ranking as well.
Headings are a vital element of any website since they structure the text and content in a meaningful way and give them a hierarchy too. In this way, headings actually help increase your content readability, which, in return, makes visitors stay longer on your site.
When users visit a web page, they typically scan the text on this page using the headings to get an idea of the content and whether or not it is relevant to them. This works in the same way with search engines. A page’s heading helps Google get an overview of the page’s content and subtopics. So yes, headings contribute directly to search engines better understanding your web page.
Now, when it comes to headings, the main one you want to think about is the H1 heading.
The H1 heading is the most important one on any web page. It should summarise the entire content of the page and contain the most important SEO keywords. In addition, the H1 heading has to interest the user in the content of that page.
One common mistake that many people sadly tend to make is including very general wording like welcome or their company name in the H1 heading. Well, they must instead use the keyword that they want this very page to rank for in order to make it stand out.
So again, the H1 heading should match the text of the page and describe the page succinctly as well.
Yet, one thing to keep in mind is that the H1 heading should only be used once on every single page. Therefore, it is like the main heading of each page. That said, you can still use multiple other headings, such as H2, H3, H4 and H5.
Your headings should not be too long or too short. You should keep them within a limit of 80 characters. This is just a guideline to ensure that the heading describes the content of the following paragraph concisely but also in an informative way.
Seoability will scan your page and see if you have used headings, how many headings there are, how often they are used, and whether or not they are enough for the amount of content you have on that page.
If any heading is used inappropriately, Seoability will highlight this issue for you in the SEO report. If you scroll down, you can see that it has listed out all of the heading structures, so if you ever need to change one, you can look up this heading structure and see which one needs to be changed.
If you have any duplicate headings, it will also come up in the report. You want to use heading tags in a way that structures your text logically and summarises the central theme of your web page. They should be informative enough to tell the users what exactly your page is about without the need to read every single paragraph.
Basically, you can picture your own website as a Word document, and the content on your document should be separated into different headings. You then want to stick to the correct hierarchy. That is a descending order of HTML tags.
So first, you want to start with an H1 tag, then you have your H2 tags and after that, you should use H3. While skipping that hierarchy is not a big issue, it still makes it a bit difficult to keep your page structure correct.
In other words, you should always work to get the structure right, as Google will rank your web page a little bit higher if you do. A good structure shows that your content is organised and structured in a pretty meaningful way.
GTmetrix vs Seobility

With everything that Seoability measures and scans that can help improve your website’s SEO and make it rank high on the search engine results page, this website analytics tool will also check your server speed, yet not as in-depth as GTmetrix. But it will give you some overall guidance on performance anyway.
As we mentioned earlier, GTmetrix will give you a more in-depth list of how your site is doing in terms of performance, what is actually hindering your website performance and how to fix it. Whereas with Seoability, it will give you a basic overview of what your site response time is and if there are any CSS or JavaScript files that might be causing issues to your load time.
One interesting thing about these two tools is that you can use them in conjunction with one another to scan your website for SEO and performance. As website analytics, these two tools are essential for understanding your audience, measuring performance, identifying opportunities, and making data-driven decisions.
 Noha Basiony

 Eman Sameh // 11th February 2024
 ProfileTree // 14th February 2024
 Ranel Viala // 11th February 2024