One of the world’s leading content management systems, WordPress is the popular choice for most businesses. For ease of use, security, and reliability, WordPress constantly performs better than its competitors with over 50 million users. With that in mind, we’ve created the ultimate checklist to help you create an incredible design that attracts your audience and ensures that it performs well on search engine results pages. From registering your domain name to optimising your site, learn how to design your website in WordPress.
Table of Contents
The Ultimate Checklist for WordPress Website:
1. Choose and Register Your Domain
The first thing you need to do when building your website is to get your domain name. This is how people find your website in the search bar. The most important parts for your WordPress site are your root and top-level domains. The top-level domain is the very end part of the domain. The most popular top-level domain is .com which is why most names are taken under that. There are plenty of alternatives like .co.uk, .us, .ie or even .org, and .net. Select your preference and you’ll have your top-level domain.
A root domain is what comes before the .com, for example. Root domains allow us to express our creativity and are a great way of highlighting our business name. The two restrictions of a root domain are that it has to be unique and that it consists only of numbers, letters, and hyphens. It is possible to buy already registered domains but they usually come with a hefty price tag. There are plenty of websites that you can buy a domain unique to you from GoDaddy.com, Namecheap.com, and Bluehost.com.

2. Finding a Hosting Provider
The next step is to sign up for a hosting provider. This space is like a virtual plot of land that you can build your website on. It ensures that your website goes online. When sourcing a WordPress hosting provider, you will need to find one that has a PHP version of 7.2 or greater, a MySQL version 5.6 or greater or MariaDB version 10.0 or greater, and finally HHTPS support. The best hosting provider, that includes all of the above criteria, is Bluehost, which is recommended by WordPress itself.
3. Install WordPress
Now that you have your domain and hosting provider, you can download WordPress. Depending on who your hosting provider depends on how you install WordPress – it can be one-click or manual. With one-click installation, all you need to do is log into your hosting account and click ‘Install WordPress’, choose the domain name you want to install, and agree to the license and service agreement. If you are manually installing WordPress, you will need to download WordPress to your computer first and then reupload to your hosting provider and follow the instructions on their site.
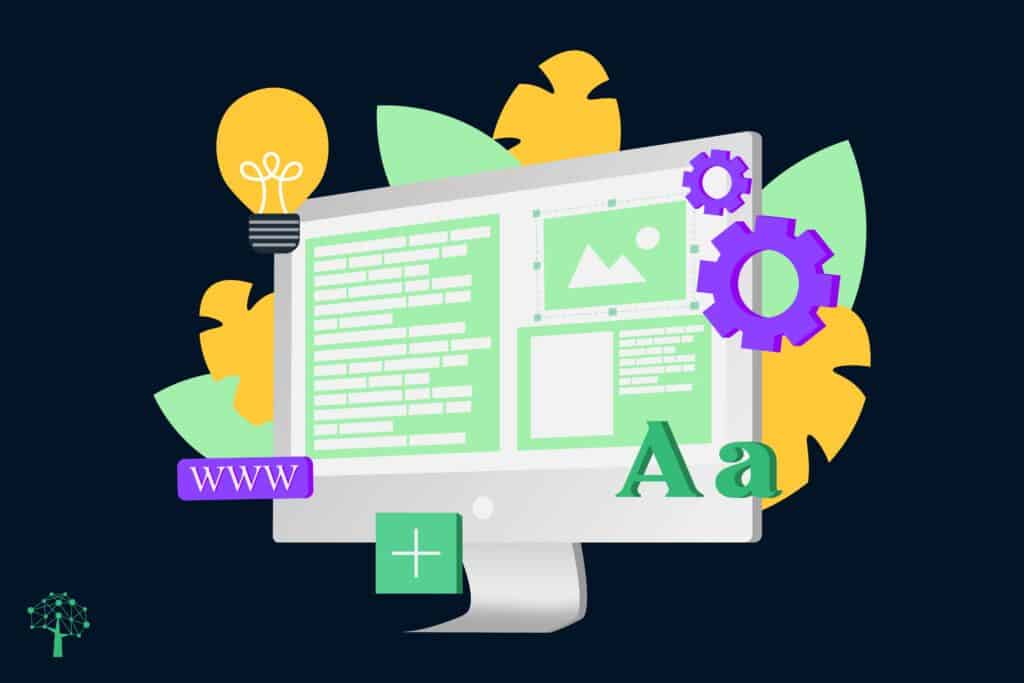
4. Design Your WordPress Site: Choose A Theme
WordPress is a website that allows for unlimited customisation – a real positive if you are a talented coder. If you don’t understand coding, WordPress have beautiful themes to help you design a gorgeous website. WordPress comes with a variety of themes that serve as a template for your website. From here, you can tweak aesthetics and add your own content to personalise it.
You will be able to test each theme before committing to an aesthetic allowing you time to work out what looks best on your site and does it serve its purpose/ To install a free WordPress theme, simply login to your WordPress dashboard and hover ‘Appearance’.
From there, you will be able to click on ‘Themes’ and this will navigate you to the theme dashboard. Click on the button that says, ‘Add New’ and browse themes under ‘Featured’ or use the search bar to find themes that are relevant to your website’s topic or industry. Once you have found a theme of your choice, hit ‘Install’ under the theme to download it. After a few minutes, you will see a button that says ‘Activate’. Click on this and your website will have its chosen theme.
5. Design Your Content
With your theme installed, you will be able to add your custom content to the site. Content is added in two categories: pages and posts. Depending on what you are uploading depends on what you need. Pages are considered static content meaning that they don’t change unless they are edited. This could be the ‘Services’ or the ‘About Us’ section. To add a page on WordPress, simply go to ‘Pages’ and click on ‘Add New’. Posts can be found on blog pages or even on the home page.
They are usually listed in chronological order and can be added by going to the ‘Posts’ section and then selecting ‘Add New’. Content can be added in text blogs, through uploading imagery and video, embedding videos from sites like Vimeo or YouTube, or adding a carousel of images via image galleries.
6. Design Your Site Through Customisation
WordPress offers multiple customisation options to make your work stand out from other spaces. The first step of customisation is your site title. Login to your WordPress dashboard and head to ‘Settings’ then ‘General’. From here you can add your title beside ‘Site’s Title’. You can also add a short description of what your site is about by typing a bio beside the ‘Tagline’, then hit ‘Save Changes’.
Another feature that should be added to your site is your navigational menu. This allows users to find your content with ease. When in your WordPress Dashboard, click on ‘Appearance’ and head to ‘Menus’. From here, you will be able to add a ‘Menu Name’ and then select pages you’d like to add from the list down the left-hand side. Once you’ve hit save your menu will be live on your site. Arguably your most important page, the homepage can either be static or dynamic. A static page will keep the same content but if you use a dynamic page you will have a homepage with your latest posts. In your dashboard, head to ‘Settings’ and click on ‘Reading’.
From there, you’ll be navigated to a page that says ‘Reading Settings’, the first being ‘Front Page Displays’. Here, you can select whether you want a static or dynamic page. If you do decide to have a static page, ensure that you have a blog space to upload your latest posts.
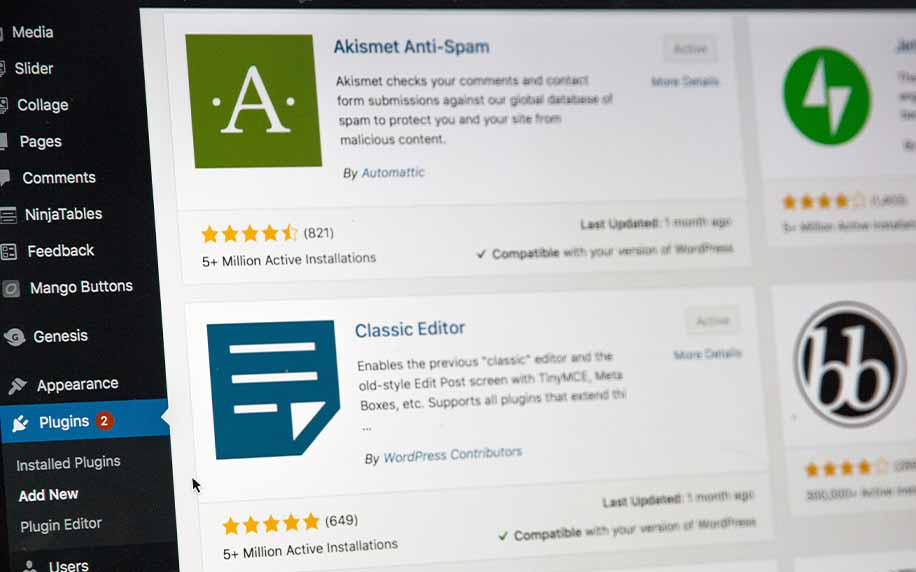
7. Customise Your Plugins
Using plugins is a great way of customising your website and can create a really cool space. Plugins are features not offered by sites but that can be installed, like an app, to enhance your site’s experience. There are over 56,000 plugins available for WordPress users, so there is something for everyone. Word of warning, too many can slow down your site, so only use plugins that will enhance your site’s functionality.
Plugins like Yoast can help with SEO and WooCommerce gives WordPress an eCommerce functionality. Read reviews and research what would best serve your site. To install plugins, you can go to the ‘Plugin’ section and ‘Add New’. You can install them through this button and simply activate them when you are happy with your selection. You can configure your plugins through settings. Ensure you update them often as well as this can impact your site.

Optimizing for Speed and Performance: A Deep Dive
In the fast-paced world of online experiences, website speed is king. Visitors expect lightning-fast loading times, and rightfully so. A slow website can lead to frustration, lost conversions, and ultimately, a negative brand perception. To stay ahead of the curve, optimizing your website for speed and performance is crucial. Here’s a detailed look at three key strategies:
1. Enabling Caching and Compression:
Think of caching as your website’s short-term memory. It stores static content like images, CSS, and JavaScript files on the visitor’s device, eliminating the need to download them every time they visit a page. This significantly reduces server load and page load times. Popular caching plugins like WP Super Cache and W3 Total Cache can help you implement caching effectively.
Compression further shrinks your website’s file size before it reaches the visitor’s browser. This is like zipping up your files before sending them, making them smaller and faster to download. Tools like Gzip and Brotli can be implemented through your hosting provider or plugins like Autoptimize to compress your website’s content.
2. Minifying CSS, JS, and HTML:
Minification is the process of removing unnecessary characters and whitespace from your code. This might seem insignificant, but those extra spaces and comments can add up, slowing down your website. Tools like Minify HTML, CSS, and JavaScript (Minify) and WP Rocket can streamline your code, reducing file size and improving performance.
3. Lazy Loading Images and Videos:
Images and videos are beautiful additions to your website, but they can also be significant contributors to slow loading times. Lazy loading addresses this by only loading the images and videos that are actually visible on the user’s screen at first. As the user scrolls down, other images and videos are loaded progressively. This technique significantly reduces the initial page load time, improving the overall user experience. Plugins like WP Rocket and Lazy Load by WP Rocket can implement this functionality effectively.
Bonus Tips for Speed Optimization:
- Choose a reliable web hosting provider: Your hosting provider plays a crucial role in website speed. Opt for a reputable provider with a strong track record of uptime and performance.
- Optimize your database: Regularly clean up your WordPress database by removing unnecessary revisions, comments, and transients. This can free up space and improve database performance.
- Use a Content Delivery Network (CDN): A CDN stores copies of your website’s static content at various locations around the world. This ensures visitors get content from the closest server, reducing latency and improving loading times, especially for users far from your physical server location.
- Monitor and analyze: Use website performance monitoring tools like Google PageSpeed Insights or GTmetrix to identify bottlenecks and track progress after implementing optimization strategies.
Remember, optimizing for speed and performance is an ongoing process. By employing these strategies and staying updated on the latest best practices, you can ensure your website delivers a fast and enjoyable experience for your visitors, boosting conversions and building a strong online presence.
Setting Up User Roles and Permissions in WordPress: A Hands-On Guide
WordPress offers a robust system for managing user roles and permissions, ensuring your website operates smoothly and securely. Here’s a detailed breakdown of setting up the three key roles you mentioned:
1. Admin Access for Full Control:
The Administrator role is the supreme user with complete control over every aspect of your website. This includes:
- Managing users and assigning roles: You can create new users, edit their profiles, and assign them appropriate roles for their tasks.
- Installing and activating plugins: This allows adding functionalities and extending your website’s capabilities.
- Theming and customization: You can change the entire look and feel of your website, modify menus, widgets, and backend settings.
- Content creation and editing: You have full access to create, edit, publish, and delete any type of content, including posts, pages, and media.
- Plugin and theme settings: You can configure plugin and theme settings to personalize their behavior and functionalities.
- Database access: Administrators have the highest level of access to the website’s database, allowing for advanced configuration and troubleshooting.
2. Editor Access for Content Managers:
The Editor role is ideal for content managers who need to create, edit, and publish content without administrative privileges. This includes:
- Content creation and editing: Editors can create, edit, and publish posts, pages, and other content types.
- Media management: They can upload, edit, and delete images, videos, and other media files.
- Scheduling and post revisions: Editors can schedule posts for future publication and manage post revisions.
- Moderating comments: They can approve, edit, or delete comments on published content.
3. Author or Contributor Access for Writers:
The Author and Contributor roles are suitable for regular writers who primarily focus on content creation.
- Author:
- They can create and edit their own posts, but cannot publish them directly. Posts need to be reviewed and published by an Editor or Administrator.
- They can manage their own profile information and upload media to their posts.
- Contributor:
- They can create new posts but cannot edit or publish them. The content needs to be fully drafted and reviewed by an Editor or Administrator before publishing.
- They have limited access to manage their profile information and upload media.
Additional Considerations:
- Custom User Roles: WordPress allows creating custom user roles with specific permissions tailored to your needs. This can be beneficial for more complex website structures or teams with diverse responsibilities.
- Security Plugins: Consider using security plugins like User Role Editor or WP Super Admin to manage user roles more granularly and enforce stricter access controls.
- Regular Review and Updates: Regularly review user roles and permissions to ensure they reflect your team’s current needs and best practices.
By effectively setting up user roles and permissions, you can create a secure and efficient environment for managing your WordPress website and collaborating with your team. Remember, choose the roles and permissions that provide the necessary access while minimizing potential security risks.
Integrating Analytics and Selecting Reliable Hosting: Key Pillars for Website Success
In the digital age, data is king. Understanding how users interact with your website is vital for optimization and growth. Similarly, choosing the right hosting provider ensures a seamless and secure online experience. Here’s an in-depth look at integrating analytics and selecting reliable hosting:
Integrating Analytics:
1. Connecting Google Analytics:
A must-have for any website, Google Analytics provides comprehensive insights into visitor behavior, traffic sources, page views, and conversions. Here’s how to connect it:
- Create a Google Analytics account: If you haven’t already, sign up for a free Google Analytics account.
- Install the tracking code: Add the provided tracking code snippet to your website’s theme or plugin like Yoast SEO.
- Configure settings: Tailor your settings to track specific goals, conversions, and user demographics.
- Analyze and iterate: Regularly analyze your analytics data to identify patterns, assess the effectiveness of your marketing efforts, and make data-driven decisions to improve your website performance.
2. Adding Facebook Pixel for Ads:
If you run Facebook ads, the Facebook Pixel is essential for tracking ad performance and targeting your audience effectively. Here’s how to set it up:
- Generate the Pixel code: Create a Facebook Pixel within your Ads Manager.
- Add the Pixel code: Similar to Google Analytics, place the Pixel code snippet on your website.
- Set up conversions: Define specific actions you want to track as conversions (e.g., newsletter signups, purchases).
- Optimize your ads: Utilize Pixel data to understand demographics, interests, and actions of your website visitors for better ad targeting and campaign optimization.
3. Heatmaps for Understanding User Behavior:
Heatmaps visually illustrate where users click, scroll, and interact with your website. This provides valuable insights into user experience and potential areas for improvement. Popular heatmap tools include Hotjar, Crazy Egg, and Clicktale.
Selecting Reliable Hosting:
1. Balancing Cost, Speed, and Uptime:
Finding the right hosting plan involves a balancing act. While budget is important, consider prioritizing high speeds for fast website loading times and reliable uptime to avoid downtime and lost visitors.
2. Considering Security Protections:
Choose a hosting provider that offers robust security features like malware scanning, firewall protection, and regular backups to safeguard your website from cyber threats.
3. Scaling Capacity for Future Growth:
Anticipate your website’s potential growth and choose a hosting plan that can scale with your needs. Shared hosting might be suitable for small websites, while dedicated servers or cloud hosting offer greater flexibility and scalability for larger or resource-intensive sites.
FAQ:
- What’s the best way to connect Google Analytics to my WordPress website? The easiest way is using plugins like MonsterInsights or Yoast SEO. They guide you through the process and automate some settings.
- Do I need both Google Analytics and Facebook Pixel? Google Analytics provides broader website insights, while the Pixel specifically tracks Facebook ad performance. If you run Facebook ads, the Pixel is essential.
- Which heatmap tool do you recommend? Hotjar, Crazy Egg, and Clicktale are popular options, each with different features and pricing plans. Consider your budget and specific needs when choosing.
- What hosting features are most important for security? Look for malware scanning, firewall protection, regular backups, and automatic security updates. Managed hosting often offers additional security layers.
- How can I tell if my website needs a hosting upgrade? Slow loading times, frequent downtime, and resource limits exceeded are signs it might be time to upgrade.
Conclusion:
Empowering your website with the right analytics and reliable hosting is like fueling your car for a smooth and successful journey. Google Analytics and Facebook Pixel provide invaluable insights into user behavior and ad performance, helping you optimize your website and marketing efforts. Heatmaps offer visual clues to improve user experience, while a robust hosting provider ensures consistent uptime, optimal speed, and data security.
 ProfileTree

 Rahma Ali // 9th February 2024